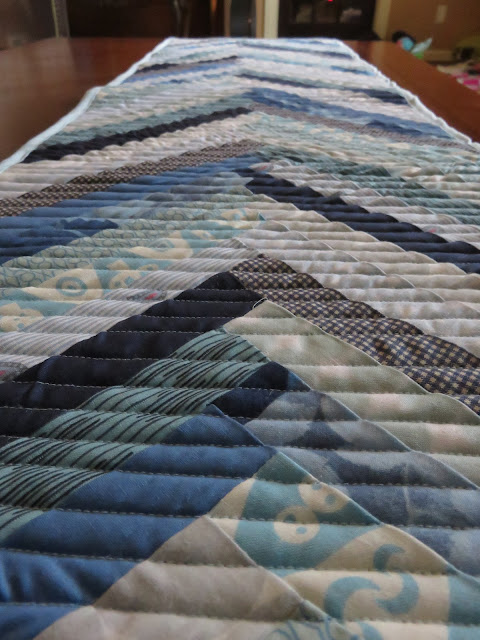
This past November, I got a new sister! My brother got married to a wonderful girl, and I wanted to make them something really beautiful as a wedding gift.
I found the instructions for this herringbone table runner over at
Laurel Leigh Studios. I highly recommend the tutorial - it was well-written and very easy to understand.
I almost forgot to take pictures of this finished project. I actually had it all wrapped up (perfectly, I might add) and had to undo my wrapping so I could take pictures for you guys.
This project was intense, to say the least. Because of the herringbone pattern, you have to iron down the seam you just sewed before you can add the next strip. I brought my sewing machine into the living room and had the ironing board set up right next to it. Despite making this in October, I did a lot of sweating! :)
Here's the runner after being quilted, but before being bound.
I added this little tag, too.
The batting in this table runner is insulated batting - although I didn't realize that I needed to also add a layer of cotton batting until after I had quilted 100 rows. So, it's not quite as functional as I wanted it to be, but it is very pretty!


Since making this, I've learned a really great technique for machine binding (more on that in a future post), and purchased a walking foot, but since I had neither of those in my repertoire then, I'm still pretty pleased with how the corners turned out. The only less-than-pretty bits are on the back, and no one will see them there anyway.
I'm really proud of this project - and yet I also kind of want to redo it now that I have a walking foot! Though the table runner is still a good size, it's several inches smaller than I had intended to make it. Because I just used my regular presser foot to quilt it, the whole thing went a little wonky, and I had to trim down quite a bit from the edges to even it out.
This project is so versatile. First of all, herringbone never really
goes out of style, so this is something you can keep around forever. Secondly, you can use any combination of colors to make this suit any decor or season. Thirdly, you could even make it reversible; what if you made two 'tops' in different seasonal color schemes? I'm picturing a red and green pattern for Christmas on one side, and then a red and white pattern on the other side for the rest of the winter.
I also had fun experimenting with making hot pads, although, again, I still didn't realize that insulated batting requires a layer of cotton batting to be truly heat-proof. So this hot pad is adorable and completely useless. (Well, Jo has adopted it as a toy, so there's that at least.)
It's pretty clear in this one how much I needed a walking foot - as the rows all sway out!
Have you ever made anything with insulated batting?
Love and Rainbows,
Leah Joy


