Showing posts with label Crafty Friday. Show all posts

Friday, September 6, 2013

Kitchen Crafts

Henceforth, Fridays shall have a new tag.  (Ooh, thrilling.)  Around Christmas, I don't struggle to find a craft to share, but the rest of the year, I'm not always crafting.  So Friday Surprise means anything.  It could be a craft, another recipe, an update on our house, or a personal post.  (Or I might take the day off.)

Today, I'm going to share a couple of kitchen updates we did over the summer.  My sister and friend came over one Saturday this summer and we had a girl day and did crafts all day, pretty much.  These first pictures are of our new kitchen clock.  We have the clocks on the oven and the microwave, but I really wanted one over the door.  I found the clock at Salvation Army for $2, but it was really beat up and a nasty off-white.  However, I decided we could probably paint it, and I was right.  We even used free paint (a Lowe's Valspar promotion a few months ago).  It took a coat of primer first and then this beautiful green:


It's above our pretty arched doorway like this:


 Later that same day, we were looking for another craft, and so I looked through the Pinterest board I created for my sister.  We found this pin and decided to give it a go:


Except, of course, we couldn't pick just one shape.  I got hippos, Claire got unicorns and butterflies, and Chloe got various dinosaurs.  We used old calendar pages, an atlas, and various magazines.  I taped mine to a braided strand of yarn and then hung them up in my kitchen:


Aren't they so cute?!  I love them - and they're perfect for the space.

Have a wonderful weekend!

Love and Lollipops,
Leah Joy

Friday, May 3, 2013

And Even More Magazine Bows

I have a new favorite craft project.  I cannot get enough of these.  My mom and my friend Claire came over the other day to do crafts, and so I taught them this one, and then Claire taught my sister, who then made 7, so apparently I'm not the only one addicted to this craft.  


I will say that for the magazines, we had to drop all the dimensions by 1 inch because our magazine pages weren't 11 inches tall.  But we kept the middle one 3.5 inches because 2.5 inches made an awkwardly tiny middle circle.

Love and Pottery Barn,
Leah Joy

Friday, April 26, 2013

More Magazine Bows

I shared on Wednesday about this newspaper bow I made as part of my 101 Things in 2013 project.

This was #28 on my list.


I liked it so much, I made one out of the local businesses coupon book, which turned out colorful, if weird because of a woman's face near the top.


Then, I cut a page out of an old map book I recently acquired (for free, of course), and made this one: 


Because these pages are so heavy, the Scotch tape isn't holding them together very well, so I'm considering shoving a brad through the whole thing.  I think that would make this bow so sturdy it could be reused over and over and over!  (And over some more.)

For now, however, they're decorating my mantel along with all of our picture frames that we have yet to hang.

Love and Ireland,
Leah Joy

Friday, March 29, 2013

Curls!

Maybe you've seen this pin, or one like it:


At the Pretty Pink Princess Party, we decided to try this on Chloe's hair.  Chloe has so much hair, and it's so straight and long and beautiful.  But it refuses to hold curls from a curling iron.  So, we thought we'd see how this 1950's-esque fad worked.

Let's just say this to start: that girl in the picture has 1/16th of Chloe's hair at half the length.  It took me all of Alice in Wonderland and half of Pocahontas to do this to her hair!


And then she looked ridiculous.  But I promised her that her face wouldn't be in the pictures with the funny curlers.

In the morning, Claire and I took out the rags (a much shorter process) to find this:


How cool is that?  (She's laughing because Claire and I were both surrounding her, taking pictures like paparazzi.)


So, they're not perfect, but if she ever asks me to do this again, I'll know that taking my time makes nicer curls.  The ones I tried to rush (because I knew it was killing her to sit still that long) were the ones with funky ends.

And the best part is they stayed all day.  Except then she had to shower.  She said the curls evaporated the second they heard the water start, basically.  Which is the opposite of what happens when you straighten my hair.  :)

Love and the Color Blue,
Leah Joy

Friday, February 22, 2013

Orange Slippers!

When making these slippers, I combined these two patterns to make my own.  So while the combination below is technically from my head, I can't take credit for it.  Also, the strap is my sister's creation.  She thinks it's no big deal, but I refuse to take credit for her adorable addition.

As I mentioned before, I made my slippers this way and thought they were perfect:


My sister loved them, too, and asked for the pattern.  She made her own pair, but added a strap.  After seeing that, I had to add a strap to my pair, too!

So cute!

Here's the pattern:

US Terminology
Worsted Weight Yarn
I used an H-8 hook.

Chain 2
Rd 1: 6sc in 1st chain.  Slip stitch to join
Rd 2: Increase in each stitch (2sc in each sc)
Rd 3: *Sc, 2sc (repeat from * around)
Rd 4: *Sc, Sc, 2sc (repeat from * around)
Rd 5: Sc around
Rd 6: Sc around
Rd 7: *Sc, Sc, Sc, 2sc (repeat from * around)
Rd 8-22: sc around 
Row 23: Sc 2tog, sc 21, sc 2 tog
Row 24: Turn, ch1, sc 22
Row 25-32: Turn, ch 1, sc across
Row 33: turn, chain 1, 2sc in first stitch, sc 20, 2sc in last stitch
Row 34: Turn, ch 1, sc acroos
Row 35: turn, chain 1, 2sc in first stitch, sc 22, 2 sc in last stitch
Row 36: Turn, ch 1, sc across
Row 37: Turn, ch 1, 2 sc in first stitch, sc 24, 2 sc in last stitch
Rows 38-40: Turn, chain 1, sc across

Finish off, leaving a tail. 

Turn the "heel" inside out and stitch up with tail.  (This way, the seam will be on the inside.)

Tie off and weave in ends.

Notes: I made this to fit my size 9 foot.  I made it a little tight on my foot to help it stay on.  My sister has a size 7 foot and hardly decreased the size of hers at all.  Rounds 8-22 are from your toe to where the top part of the slipper stops.  Rows 25-32 are the length from where the top part stops to where the heel starts to get taller.  Both of these sections are good places to decrease or increase rounds/rows.

These are my sisters instructions for a strap.  Depending on your foot you might want to make this bigger or smaller:

Ch 23
Row 1: Turn, Sc across (22)
Row 2: Turn, ch 1, sc across until 5 from end, ch 4, sc in last stitch of row
Row 3: Turn, ch 1, sc across (including the 4 chains)

Finish off and leave a tail.  Use the tail to attach strap to slipper.  Sew a button on the other side.

These are the hooks I use:


I like that they're color-coded, because that's the way my brain works.

I love my slippers and wear them around the house a lot.  I love that I can just toss them in the wash if they can get dirty.  And once I make my legwarmers, I won't need to wear socks on days I stay home.  (And I don't like to wear socks.)

Love and Bells,
Leah Joy

Friday, February 15, 2013

Treasure Box Book

At a recent library book sale, my mom, sister, husband, and I snagged the "Bag of Books for $2" deal.  You get to fill a big brown grocery bag as full as you want.  At that point, it feels like every book is practically free, since we get at least 25 books in there!  

Chloe picked up this cute Reader's Digest book there.  We're not big on condensed/abridged books, but it was really cute, pink, and had Little Women as one of the volumes in it!  So, I made a box out of it.  You may have seen these on Pinterest.  The standard tutorial is this: glue the last few pages down to the back of the book.  Wrap the cover and any front pages you want saved in wax paper, then Mod Podge along the outside of the rest of the pages.  (I would recommend pressing it under a few big books at this point and letting it dry.)  Once dry, mark with a ruler where you want to cut, then start cutting down with an Xacto knife.  This part was far more strenuous on my fingers than I imagined, but I eventually made it to the end!  Then I Mod Podged inside, and then outside again for good measure, then pressed it beneath the books to dry again.

I even saved many of the pages I cut out (I recycled the rest) for future projects.


The inside isn't even close to perfect, but I think it looks cool.


I'd definitely recommend this project.  It was a lot of fun!

Love and Marco Polo,
Leah Joy

Friday, February 1, 2013

Mason Jar To-Go Cup

EDIT - April 2014 - I may have thrown the lid in the dishwasher or I may have just hand washed it (honestly can't remember), but it has been rusting for several months.  I'm considering trying this again and looking for some sort of food-safe sealer to apply.

This is my new favorite project for so many reasons:

1. Cheap.  I bought the jar at Hobby Lobby for $1, but I'm sure you could find one cheaper, or you may already have one.  I bought the grommets at Lowe's for $1, and it's a two-pack.  Those are the only ingredients, aside from a drill bit, a drill, and straws.  I borrowed the drill bit from my dad; I have a drill; and you can get 180 straws at the Dollar Tree for $1.

2. Cute.

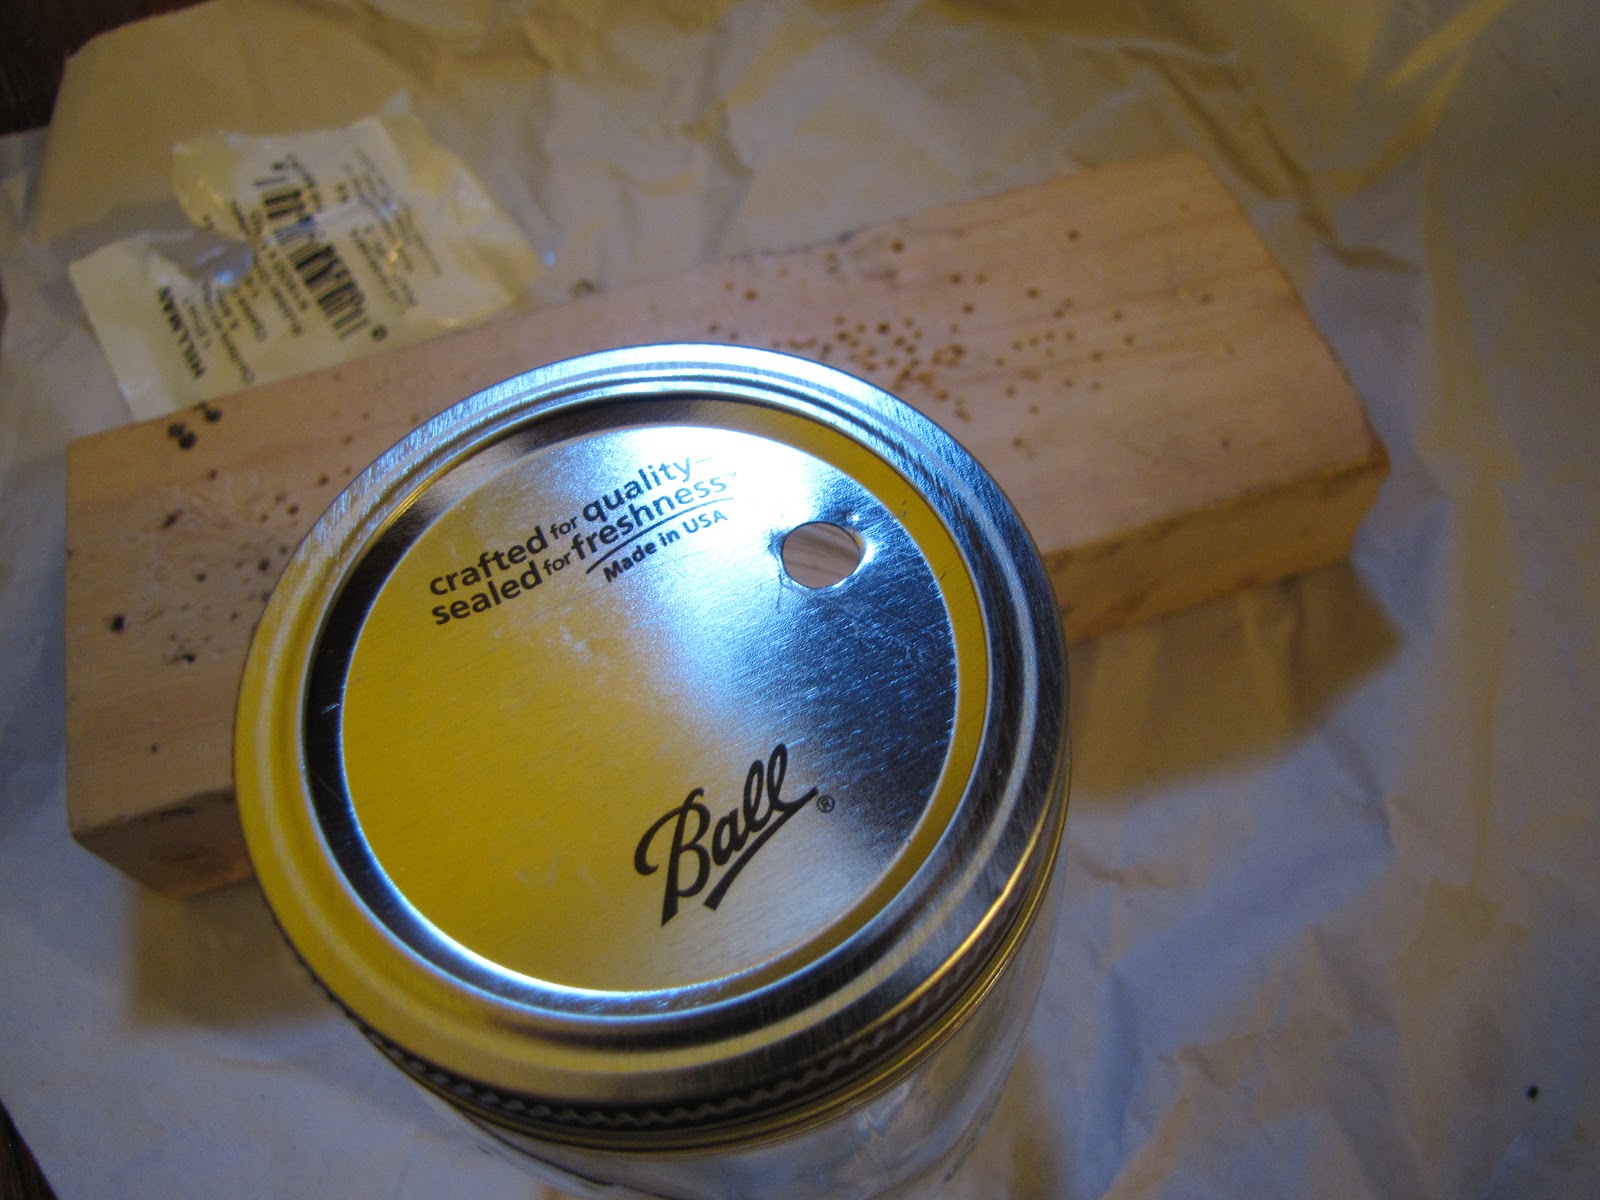
3. Quick and easy.  Other than the time it took to find the parts, this took 5 minutes.  Drill a hole, pop the grommet in, wash, and go!

4. Practical.  Now I can take lemonade from home to work without spilling.

5. Earth-friendly.  You could make dozens of these and use them for a party instead of paper or plastic cups.  You could make labels to tie on, so people would know which one was what one and what one was whose. And it'd be so cute!

Anyway, enough rambling.  Check out the original directions from AdelynSTONE for a great tutorial.


Gather: 
Mason Jar and Lid
9/16"-1/4" Rubber Grommet
3/8" Drill bit
Electric Drill

The drill bit is not in this picture because I didn't have it yet.
Here's what the grommet package looks like.
 My dad always taught me to drill over a block of wood, but in this case, the original tutorial is correct.  Drill over the cup, because otherwise the bit won't go through.  Now, I realized that in my collection of drill bits, and even in the box my dad had left at our house, the largest size I had was 1/4".  I thought I could make it work.  Watch me fail.

This is a 1/4" hole.  
 Now, the inside of the grommet is 1/4", but the outside is bigger and will not fit.


I tried anyway:

And in doing so, destroyed this grommet!
To get the straw in, I had to twist and fold the end and thread it in.  Kind of not practical or pretty: 


So, I borrowed a 3/8" bit from my dad, made the hole bigger, and then the 2nd grommet popped in no problem.  So I mixed up some Kool-Aid strawberry lemonade (which is not worth the 10-cents or your cup of sugar - but if you happen to make it anyway, add a dash of lemon juice to make it taste better) and here she is:


So cute!  I want to make a million more and give them to everyone I know!  And final cost for me, since I sacrificed the first grommet to the name of science and determination, was $2 for this cup.  Not bad for something very reusable!

Love and Kool-Aid,
Leah Joy

Friday, December 14, 2012

Christmas Sneak Peek #3

Some more sneak peek pictures for your curiosity (or not).


Love and Almond Oil,
Leah Joy

Friday, December 7, 2012

Christmas Sneak Peek #2

Here are some more sneak peek pictures!


Love and Popcorn,
Leah Joy
Friday, November 30, 2012

Christmas Sneak Peek #1

Every Friday from now until Christmas, I'm going to share a few sneak peek pictures with you of my homemade items or other gifts.  These remind me of those games where you have to guess what the object is from a close-up picture.

I hope you enjoy!


Love and Surprises,
Leah Joy

Friday, November 9, 2012

Summer Chore Chart

This summer, my life was rather hectic.  I'd get up at 7:00, shower and get dressed, read my Bible, and then head over for breakfast in the dining hall.  While there I might weed my garden a little and water it.  Then back home where I might have about 15 minutes before work.  I'd work 9-5 and then go down to the dining hall again for dinner, then I'd have a few hours at home to accomplish any tasks I wanted done before falling, exhausted, into bed.

The reason I got up at 7:00 is because mornings are sacred to me.  I love being up before everyone else and having time to myself.  And I know 7:00 isn't actually that early, but it's what worked, because I couldn't eat breakfast until 8:00 anyway.  If I had my choice, I'd eat first thing, and then I have energy to do other things (clean, etc.).  But until I eat, there's not much I can do.  I wake up so hungry every morning.

Regardless of my breakfasting hour, this summer schedule really reduced any time I wanted to do things at home to a few hours in the evening, which could easily be taken up by something that seems like a small commitment to  someone else, like dinner or an hour long band practice.  In the spring, I'd do all my cleaning on one day and just get it out of the way, but I knew that with summer, that wasn't going to happen; I would never have a whole day to do it!  And I had seen all these adorable homemade chore/weekly charts on Pinterest, so I wanted to try one.  Mine would be simple, just different pieces of colored paper with the day written on, secured behind glass in a long, skinny frame, and then I'd use a dry erase marker so that if it didn't work out to do it one way, I could easily try another.

Do you know how hard it is to find a long, skinny frame (that's actually glass and not just cheap plastic) at a thrift store in my area?  Impossible!  I looked for months (I started early).  Finally one day, as I was looking for a frame, I found this:


You know what's easier than making your own chore chart?  Buying one that's the perfect size (and comes with dry erase markers and cleaning spray) for $5.  

Because it came with three colors of markers, I decided to color code.  Red is chores and blue is "social engagements".  (And I didn't use the black one.)

Did it magically happen like this every week because I had a chart?  Heck no.  I don't think Caleb vacuumed once all summer, which is fine because he worked around the clock.  And I didn't always do the laundry on the days I have specified.  (If you're wondering, the reason sheets and towels are on there and clothes aren't is because I will make time to wash my clothes out of necessity.  But when I get super busy, I need a reminder that my sheets and towels are dirty.)  

A chore chart isn't a magical lamp that gives you self-control and a desire to clean your house every day.  It's a guideline and it helped me to remember some things.  And it helps that it's not the ugliest thing I've ever seen, either.

Love and Flowers,
Leah Joy

Friday, November 2, 2012

Natural Air Freshener

If you missed the Internet exploding yesterday, first watch this video:


Secondly, I wanted to share a fun craft with you.  I found it first on Saving Addiction, a West Michigan based website that updates its readers on the best deals in the area.  They also feature a sort-of-weekly DIY project, with most of them being natural or homemade cleaners, lotions, and things of that sort.  Recently, they featured a natural air freshener.  I adjusted the tutorial a little bit, and made it a bit cuter, because that's how I roll (actually, it's not, but it made good sense here, and that's how I roll).

You'll need:

  • Small jar - preferably a short-but-wide one rather than a tall-but-skinny one
  • Cardstock
  • baking soda
  • essential oils
  • scissors
  • needle or other poky thing
  • stamp pad + stamp (optional)
  • ribbon (optional)

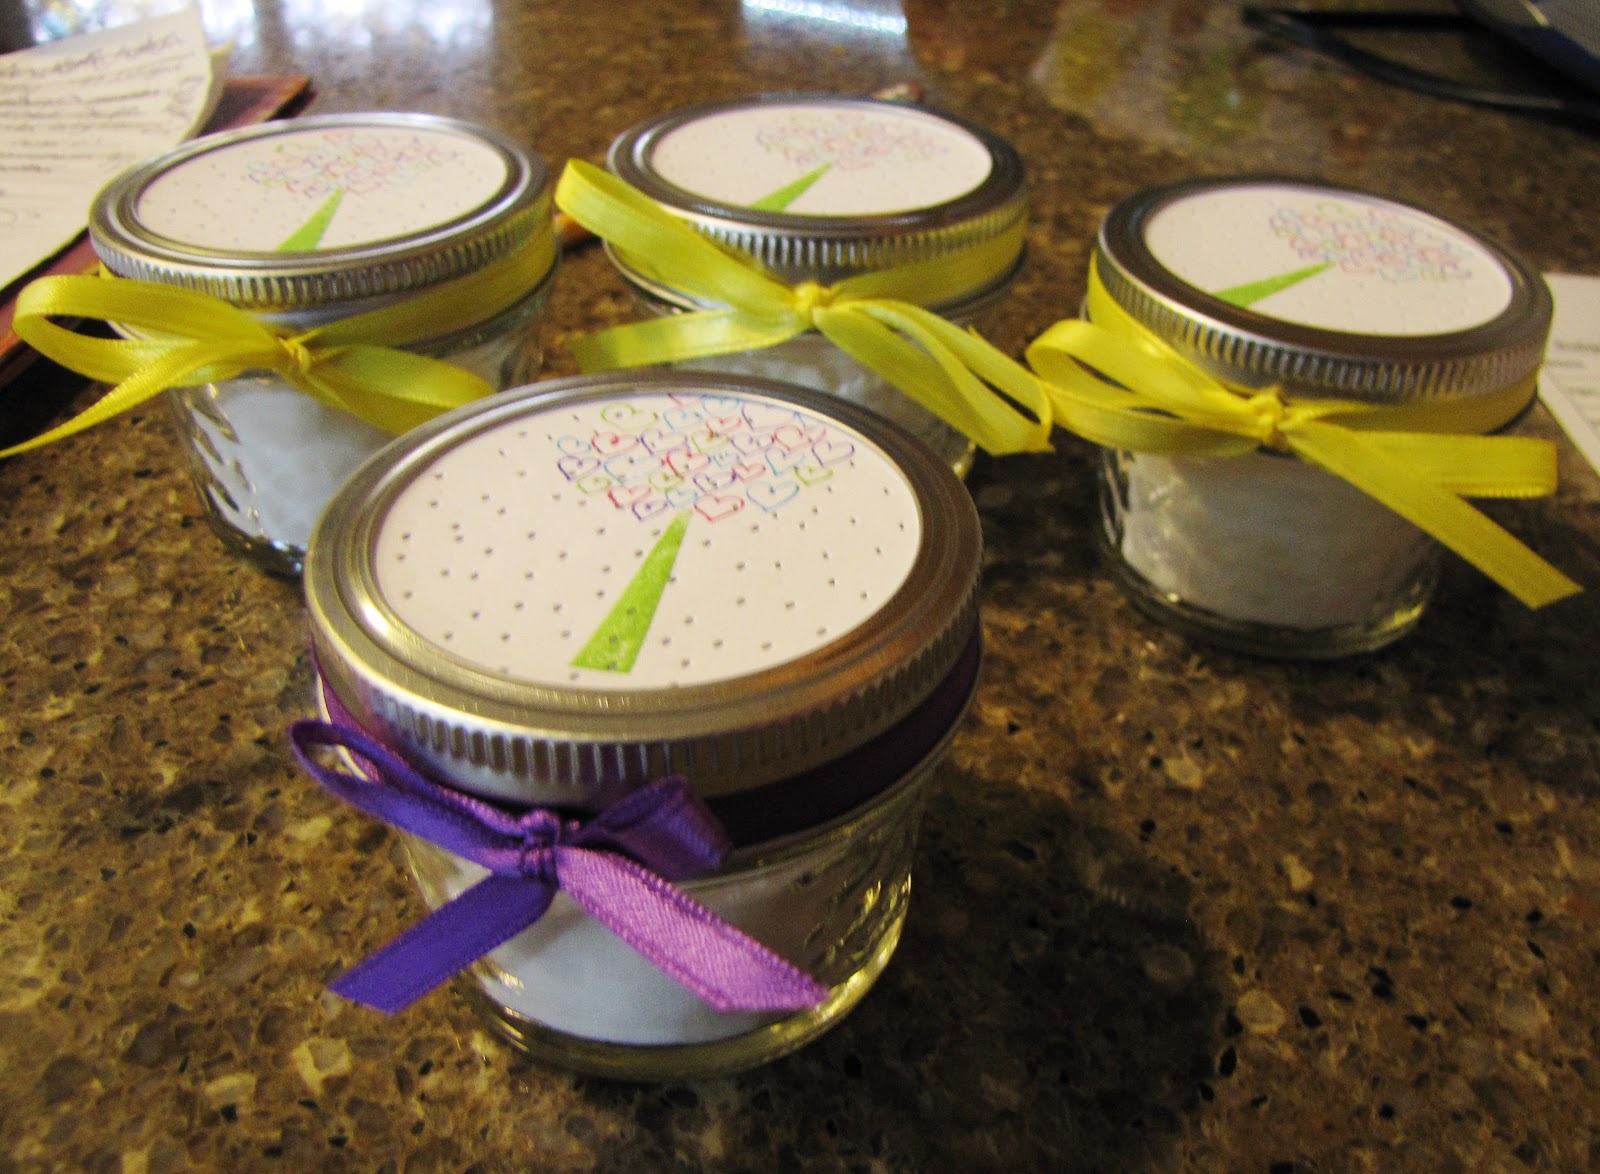
Start by taking the lid off the jar, and tracing the top of the jar on the cardstock.  Cut out your circle.  Stamp your design onto the circle.  Remember that the edges will get covered by the jar lid, so place accordingly.


I used my mom's Stampin' Up markers, which allow you to draw on the stamp with multiple colors, then you just breathe a breath of hot air on it, and stamp.  I'm sure you can do this with other markers, too. This design (as you can see) just fit inside the rings, and the first time, I placed it too high so the top of the tree got cut off.  So be careful.

Now, place about 1/2 cup of baking soda in the jar.  It does not need to be perfect.  Add 10 or more drops of essential oils, depending on how strongly you'd like it to smell.  Put the cardstock circle in the lid and place on the jar.  Poke lots of holes in the cardstock.  I used a seam ripper, as it's easy to hold and poked nicely sized holes.  Tie a ribbon around for added cuteness - or in our case, to let you know the scent.  Purple is the lavender one (that I keep by my bed) and the yellow ones are lemon.  


Aren't they so cute?  For a while, I thought they wouldn't make great gifts, because I thought you had to shake it up every time you wanted a whiff, but I can definitely smell the lavender one by my bed, and it's wonderful!


Eeep!  So cute!!

Today, I'm having a "Domestic Friday".  Laugh if you will, but if I don't make it a holiday or something interesting, it won't get done, so I need to call it something.  I have tons of cleaning, baking, and handicrafts to complete today.  :)  So here I go!

Love and Domestic Felicity,
Leah Joy

==========

UPDATE (December 5):  The scent seems to last for about 3-4 weeks.

Friday, October 19, 2012

Crochet Slippers

I had been thinking about making slippers for someone for Christmas, but I had no idea how to, so I found some patterns on Pinterest.  So far I've only tried this one.  She said it fits size 9 (which I am) so I tried it (mostly) as written.  Here's how my first attempt turned out:


For this one, I used an I hook (5.5mm), which I think was my problem, because not until after I did this did I notice she said she used a 4mm hook.  However, because I used such pretty yarn, I wanted to save it, so I took out the last several rows and finished it up like so:


It's still a little bit big, but I made another one the same size, added some embellishments on top, and I'll donate it to the camp's auction coming up in a few weeks.  The only problem with shortening it early is that I missed the increase in size to help hold it on the heel.

I've made another pair since then using a 5mm hook, so I'll post pictures of that version soon - and now I'll have to try one with a 4mm hook, too!

Love and Slippers,
Leah Joy

Wednesday, August 29, 2012

Crazy Quilt/Afghan

I can't believe I haven't shared this with you before.  I have a list of Blog Ideas and this idea has been sitting there for about eight months and I haven't posted it!  I actually had to go searching for the pictures.  Now that I have you all annoyed and impatient to see what it is, let me warn you that I apparently only took two pictures.

I wanted to make something awesome for my sister Chloe for Christmas (yes, last year) and so I thought I'd try to make a crazy quilt.  Except I can't quilt, so out of crocheted squares.  I had tons and tons of little odd scraps of yarn, so I started crocheting them into squares and rectangles.  When I had a pile, I put them on the floor in a pleasing pattern and whip stitched them together with either the end of the yarn or some yellow yarn.  At first I was hoping for a lap blanket, but when I realized how easy it was and how quickly it was going, I decided to go for something that could cover a whole person.

I worked my way down and across from the top left corner until it was as wide as I wanted, and then I worked down from there.  I basically made a pile of pieces any shape and size, laid them on the floor with the rest of the blanket until I liked how it looked, and then stitched them in.  Towards the end, I had to make maybe about 10 pieces a certain size to finish off nicely, but that was very simple.

Finally, I made a simple green border all the way around - just single crochet.

And good news - she loved it!  And I think she still does, though how I'm ever going to top that this Christmas, I have no idea!


Here's the full blanket - laid out diagonally on our bed.  (Ours is a queen, if that gives you an idea of the size of this blanket.)


And here's a close-up (complete with annoying camera spot) of one section.  You can see that not everything fit perfectly.  Some squares got pulled wonky like this one.  At first it bothered me, but it all kind of works together to make it more crazy.

The fun part is that I used all different kinds and colors of yarn.  There's fun fur, cotton, acrylic, and even some angora-knock-off stuff.  We also had fun going through and seeing what pieces we recognized from the yarn's original purpose.  (Hey, there's Mom's hat! And Grandma's scarf! And those really ugly wrist warmers you made!)

Chloe decided to try making her own.  I think she's probably finished by now because I haven't seen her working on it in a while and that was like six months ago.  Hers is way prettier than this one.

Do you have leftover scraps of yarn?  Go try your own!  It's really fun!

Do you have any other project ideas for leftover scraps?  Share them in the comments!

Love and Lemonade,
Leah Joy

P.S.  Since it's about the end of August, it's time for me to start planning Christmas presents!

Friday, March 9, 2012

Hats Off!

What a cheesy title. But I couldn't resist. I wanted to show you some pictures of all the hats I've made recently.


You've already seen my rainbow hat.


I made this one for my friend Grace. It's navy blue with a light blue favorite flower.


This one was for Chloe. It's purple with a little blue flower. I used some yellow yarn to stitch a "center".


This one was for my mom. I made her a hat a couple years ago that was about this blue with a green stripe and it was super cute (and made from some really nice yarn) but then she lost it. :( So I made her this one for Christmas.

This one was so much fun to make! I made it for Claire, one of the girls I used to nanny. (Her sister, Sarah, got those blue wristwarmers I made.) She loves pink and anything crazy she can put on her head. She has a giant pink flower clip (about 6 in diameter and it's pretty much a big flower ball) and instead of clipping it to her ponytail or something, she puts it on the side of her head where you'd put a smaller clip. So I let myself go crazy here. Hot pink hat with a bright purple flower (again, a yellow "center"). Then I added a pom-pom made with the same pink, the blue from my mom's hat, and the purple (from her flower and Chloe's hat!). Finally, I trimmed with some "Bling yarn" that I bought a while ago because ... it was shiny.... But it's really annoying to work with unless you're doing something simple like trimming a hat. :) I didn't follow any specific stitch around, just kind of slip-stitching just to attach the yarn all the way around. Anyway, Claire absolutely loves this hat. :)

I made these all with this basic pattern, which can be knit flat and then stitched up the side. (I'm terrified of knitting in the round.)

If you've only knit squares and rectangles before, a hat may sound really intimidating (at least it did for me) but this pattern is really easy. You'll have to know how to knit and purl - and also how to decrease by knitting two stitches together. I like the small size for most people, but if you have big hair, maybe medium would be better. :) But the small size fits everyone from my dad and husband to Claire and Chloe. (It also squishes my hair, which is probably why I still wear that one medium one I made.)

Love and Pineapple,
Leah Joy

Friday, February 17, 2012

Rainbow Revue


I told you I was going to make a million rainbow things (okay 4 or 5) and I did! To review today, here are some pictures!

I started with rainbow yarn. I actually found the yellow in the worsted weight, which is not shown in this picture. (That's the sport weight I used to make my sock!)

The first thing I tried was the vertical stripes scarf. I posted about that one already and this picture is about the best it ever looked. Now it just curls awkwardly, like my hair in the morning.

Then I made this hat, which unless I wear it hipster-style, makes me look like a cancer patient. This hat may be the reason why I am growing my hair out again - so I can actually wear it in public.


The only problem with this hat is where I stitched it up. I'm not cool enough to change the stitching color for every stripe, so it looks strange.

Then I made rainbow wristwarmers. I did a blog about the blue ones I made for a Christmas present. These turned out less cute but more colorful. Each new stripe has, of course, new ends to tuck in, so the edges look funny.

Plus where I stitched them up, I used purple and it shows against the red (duh).

My final project is the best and definitely the one I will wear the most. If not the only one I will wear in public.

Rainbow flower scarf!!!

(The spot is on my camera lens and can be found in every picture. I know it's there and I've tried to clean it but it won't come off. And I don't know how to load pictures off my husband's camera, but I want to learn because his camera is awesome and not crappy and then I'd get pinned more. Because that's the whole goal of blogging.)

Since then, I've used up the green, so unless I get more, there will be no more rainbow things for a while. But since I already have a horizontal stripes rainbow scarf, I really can't think of anything else to make.

Unless you readers have any rainbow suggestions. Do you? Or do you have any projects you'd like to see me try? (I have a mega-project I'm working on right now, which may not be finished for months, so when I get bored with that, I need other things to do!)

Love and RAINBOWS!,
Leah Joy