Monday, June 5, 2017

Hand-Sewn Owl Magnets

The setting: our kitchen, while making dinner
The situation: I was trying to think of a non-candle-or-lotion gift idea for my new sister-in-law

In desperation (he often has some strange suggestions), I asked Caleb if he had any ideas. He thought for a moment, and then said, "Owl magnets."

I paused. "...That's actually a good idea.  Sorry to sound so surprised."

A Pinterest search (of course) yielded some promising options, but in the end, I chose these:


These are originally from Petit Bout De Chou, and her pattern was clear and helpful.

I ended up making two sets of 3, and used them as gifts for two people.


I love how sweet and cute they are, and they're the perfect size.


Now I want to try making more animal magnets! (And I need to make some more for me, of course.)


I also got to learn how to do blanket stitch. I used Lauren Fairweather's helpful (and cheerful) tutorial.

Have you been trying your hand at embroidery? I'd love to see some pictures of it!

Love and Owls,
Leah Joy

Friday, June 2, 2017

Life Update - 6-2-2017

Good morning, dear reader(s).

It's been quite some time since I updated you on my life. In fact, I went back through my most recent posts to try to find the last update, and it took me over an hour (I had to stop and read several posts) before I found a post with half an update from when I was pregnant.

So. Let's catch up.

It's been about a month and a half since my last post on here, which is actually maybe a record for my shortest hiatus. The reality is that I have no intentions of being a professional blogger. Karen from The Art of Doing Stuff tells us that to be a professional blogger, we can't just be good writers. We also have to be photographers, managers, marketers, schedulers, etc. And I have a lot going on in my life, and my blog will not take first, or even fourth place.

But I still want to keep this updated every so often. Even if no one reads anything I post, I blog to keep a record of what I make and do.  And if you read it, I hope you enjoy it. And if you don't enjoy it, then stop reading it. :)

So, what else is going on in my life?

I'm married. My husband needs attention because he's a human.

Josephine is now 18 months old. (That's 1.5, for you non-monthers.) She takes up a lot of time, in the best way possible.

I have a house to keep reasonably clean, and a family to care for.

I have friends. (Yes, I do.)

I sew. I bake. I run a small bakery out of my home kitchen. I create things.

I so desperately want to learn Dutch but can't make myself sit down to do it often enough. But should.

So my goal is not for my pictures to be pinned. I will not share all my posts to Twitter so that I get more traffic. I don't have time - and I don't really care. (And that's okay.)

If you read and enjoy, then I'm glad!

This post is maybe a little more rambly than I intended, but it does the job.

Well, I was going to write and schedule several more posts, but I spent all my time going down Memory Lane.

Oh yes, there's my secret. Now you all know that I write and schedule my posts. The truth is that I'm fairly good about taking pictures of everything I want to share here, but I let them pile up on my computer. When I do make time to sit down and write the posts, I write several at once and then schedule them at weekly intervals. The goal, of course, would be to schedule out enough so that they wouldn't run out until I wrote more, but that rarely never happens.

Well, I intend to get back here in the next week or so and write several posts. Let's see if I stick to that. :)

Love and Rambles,
Leah Joy

P.S. Hello, I'm now editing this (afternoon of June 2) to add this: Sorry, this post included no pictures, and I had a few to add, so here they are!

These 1st two are from Pi Day (hopefully that's obvious). I made two chicken pot pies for my family, and my pi vents worked!


I also made a Dutch apple pie with pi on top. :)


I also wanted to show off some pictures of my Spring crocuses, just because they make me so happy.


Monday, April 24, 2017

Decorating Onesies (A Pseudo-Guide)

Babies are expensive. Everyone who's ever received that ginormous hospital bill knows that. And then the clothes - who else gets to change their wardrobe four times a year? (Other than supermodels.)  This is, of course, why I garage sale. And yet, there are times when I really want a specific onesie, or I've only been able to find plain ones, and I want to make them a little cuter.

Thus, my 'journey' of decorating onesies began, and today I'm going to share with you what I've learned, along with some pictures of all the onesies I've decorated so far. My skills have definitely improved over time!

The simplest way to decorate a onesie is with a Sharpie, but you can make it just a bit nicer by using a black fabric marker. These are only a few dollars each and should last quite a while. That's how I made my first several onesies.

As a general rule, I cannot take credit for the following designs. For the most part, I copied them from various sources around the Internet. Where applicable, I'll link to my source.

Source

Source


As you can see, I stuck to white onesies with black marker. While they're still cute, they look very unprofessional. This is fine; babies make everything look better. And yet, I wanted to up my game.

Enter the freezer paper stencil. I haven't posted a lot about freezer paper stencils before, but they're really a genius (and very cheap) way to personalize fabric. There are plenty of great tutorials out there, so I won't go into all the details of how to do it.  The only cons I've found to freezer paper stencils are: (1) for the amount of time you put into making them, they're not reusable and (2) it's really tricky to do designs with a lot of lettering.  

I also branched out into non-white onesies. Here are the first few I made:


Source
I've made this design as an adult-size t-shirt before, using just fabric markers. It's hard to tell in the picture, but the silvery paint is actually quite glittery. This was a bit tricky to stencil, but for the most part it's just basic lines and simple curves.  The trickiest part of freezer paper stenciling (so far, for me) is keeping track of all the little inside pieces - those have to be ironed down separately, and they're so tiny and easy to lose.

Source
This onesie is bright orange, so it took several (4-5) coats of fabric paint to get good coverage. After removing the stencil, I free-hand painted in the small details: the dots, the 'banner', and the little sunshine dashes.

These next three were done at the same time, but here I actually used patterned onesies for an extra professional look.


Source
I loved the little pink bow on this onesie, so I tried to match the paint to the bow color. This onesie is super sassy, and looks great with Jo's purple ruffle skirt.

Source
I'm pretty sure this was originally supposed to be a boy's onesie, but there's nothing boyish about it now. The glitter doesn't show up well in the picture, but the words are mega-sparkly.


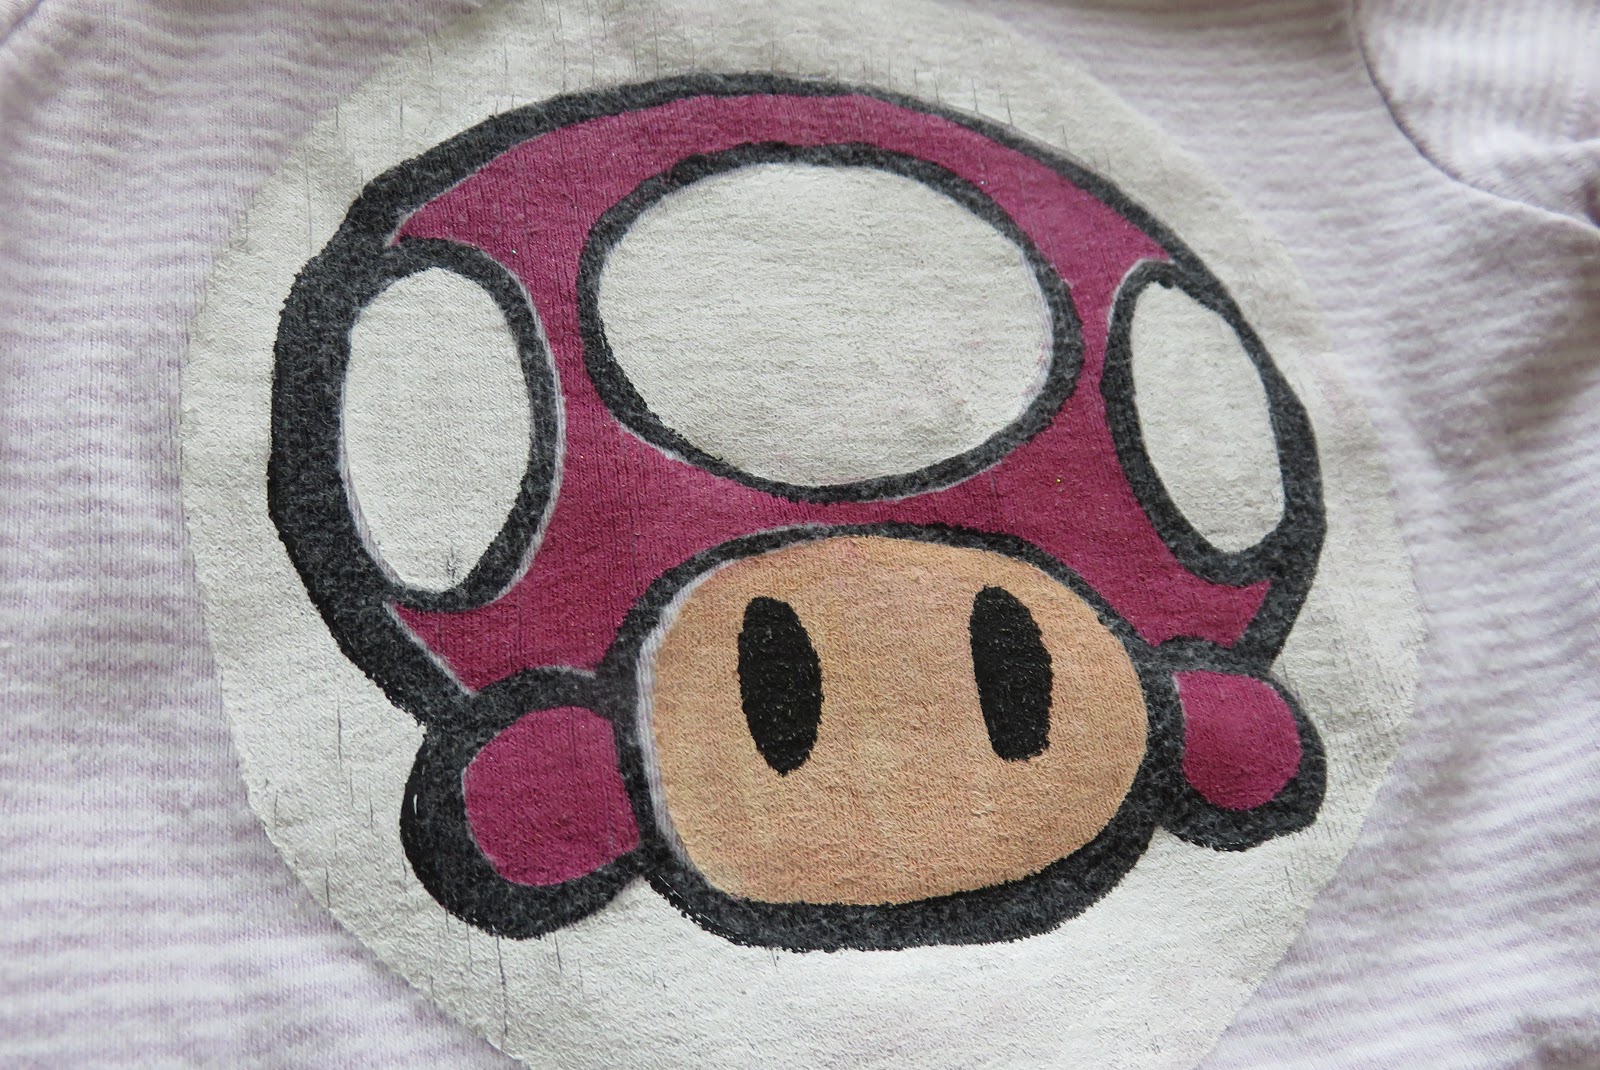
For this one, I just copied Toadette's emblem. This one actually required two different stencil applications. I first painted the white, pink, and peach parts, and then once those were thoroughly dry, I put freezer paper stencils back over them and painted the black parts.


There are a few gaps in the paint, but when Jo's wearing it, you don't really notice them.

I sort of designed the pattern for this next one - I found the wreath as a free vector image, and chose a font I liked. :) The quote is from Emma by Jane Austen.


I love how it looks on this little ballerina-esque onesie!

For my final (for now) set of onesies, I had a handful of blank white onesies. By now, I've learned that if I want a white onesie to look professional, I need to either add a lot of color, use a fairly complicated design, or at least choose a design with colors that wouldn't really look good on any other color.  Here's one of each solution:


I sort of designed this one as well. The quote is from Pride and Prejudice by Jane Austen. I found the wreath as a free image online, although I chose to free-hand paint my own flowers (after the stenciling). I used the font Simplicity.  I painted the words in a subtle blue-purple gradient.

Source
This is probably the nerdiest thing one can put on a Star Wars onesie. :) I stenciled the letters and the basic shape of the gun, but I free-hand painted all the little light grey lines on the gun.

Source
For this one, I downloaded the font 'Harry P', to make it look extra Harry-Potter-y (totally a word). It's hard to tell in the pictures, but the Snitch is extra-sparkly.


So this was mostly just to show you what I've been making, but maybe I've also succeeded at imparting a few tips for making your own.

I use So-Soft fabric paints, of which I have a whole rainbow (plus black, white, and glitter) that I purchased probably 8 years ago (and they're still going strong).

Love and Paint,
Leah Joy

Monday, April 17, 2017

Another Baby Quilt

So, in February I finally purchased a walking foot for my sewing machine!  And then I found out a distant acquaintance was having a baby, so I latched onto this excuse to test out my new walking foot. :)

Here's the finished quilt:


My goal was to not purchase any new materials for this quilt (other than the batting), and I succeeded. Both the front and back are pieced together from pieces I already had in my fabric stash (or my mom's). Even the binding was leftover fabric from my sister's curtains.


This was also my first time trying chain-piecing. Boy, will I do that again! It made things so much quicker and easier! I was able to keep all my bits in order in their rows. (And I saved at least 5 inches of thread.) :)


I also now know how to make bunting. :)

Earlier this year, I posted about a table runner I made. In that post, I mentioned that I had since found a really great technique for machine binding.  I found this tutorial over at Petit Design Co., and it is brilliant. And so simple, too. It's a two-part tutorial: Part 1 and Part 2. Once you realize how it works, it's so obvious - like, why have we ever been doing this any other way? Look how nicely my corners turned out:


This was the only error in my binding:


Once again, I added a little tag to the back:


It's not very big, but it's perfect for tummy time! And so cute!


Love and Triangles,
Leah Joy

Monday, April 10, 2017

Sparkly Baby/Toddler Skirt

A while back, I found this magical organza-ish fabric on clearance at our local fabric store. They had bolts and bolts of it on clearance, and I so desperately wanted to buy some, but didn't know what I would make with it, so I resisted. But then I realized I could make baby skirts with it, so then I bought 5 yards. I will be able to keep Jo in sparkly skirts until she's in junior high.

Here's the first skirt I made with it:


The under-skirt is made from an old bridesmaid dress (they have to have some use, right?). I used two layers of the organza to give it a little more color and sparkle.

It's been washed once now, and I'm a little disappointed. Neither fabric shrunk, but the organza rolls up a little at the bottom, so now the under-skirt hangs down an extra 1/2 inch.

If I make another in this same style, I'll be sure to make the under-skirt an inch or so shorter to compensate.  For now, it's still cute. Here are a few pictures of it in action:


Jo loves it, too. She loves dressing up and putting on pretty things.

Love and Stars,
Leah Joy

Monday, April 3, 2017

Gilmore Girls Party

This past fall, to celebrate the release of the new Gilmore Girls episodes, I threw four themed watch parties for my friends and family.

Our final event was also perhaps the tastiest. We made homemade pizza and cheesy bread sticks. (Which are amazing, by the way.)


We also all brought our favorite sweets, and made dessert sushi! This was so much fun (and a little gross, too, to be honest).

Here's our spread: marshmallows, fruit snacks, sour gummy worms, gummy bears, Swedish fish, red hots, Butterfinger bites, fruit roll-ups (the seaweed wrap of the dessert sushi world), Joe-Joe's (Trader Joe's Oreos), Red Vines, and Whoppers. (There's also a salad in there, to really balance the meal.)


We tried the 'Oreo red-hot sashimi' from the show, and it was actually really good! Like, I would make these again.


Chloe also made one with a Whopper in the middle:


We made various disgusting combinations in the fruit-roll-ups, too, and sliced them up like sushi:


The marshmallows acted like the sticky rice - helping hold everything together.

While we found some good combinations, most of them were pretty gross, and we ended up just eating the candy straight from the bowl.

Have you ever made dessert sushi? What were your favorite combinations?

Love and Sugar Comas,
Leah Joy

Monday, March 27, 2017

Christmas 2016: Gifts Round-Up

Here's the final post for last Christmas; I wanted to share just a few more things I created.

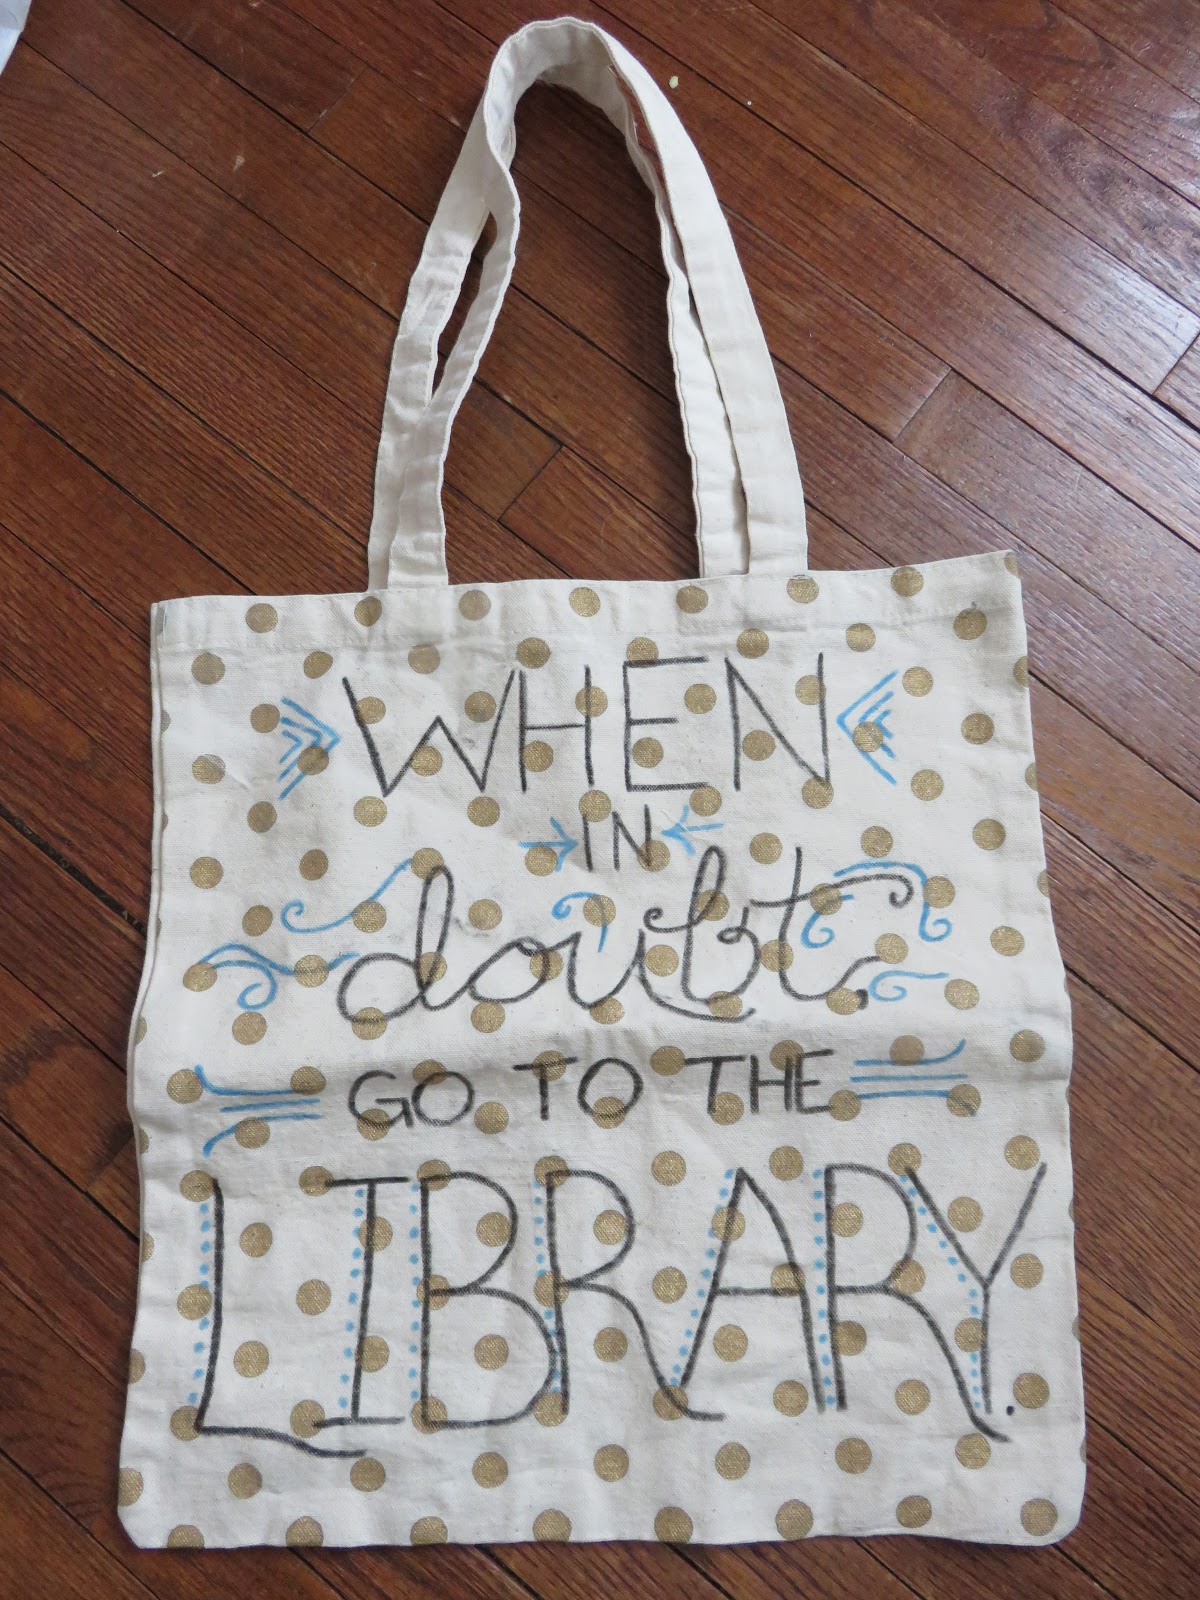
First up, I decorated this library bag for my sister - with a quote from the Harry Potter books.


I found the bag at Hobby Lobby - it already had the gold dots on it, which I thought would help make this look a little more professional (ish).  You can't tell from the picture, but this bag is really quite large, so even Hermione would find it sufficient for her library books.

Second, I made more of these hanging kitchen towels. I've posted about these before, but I think it's fun how many color combinations you can make with this project.


Finally, I made several more of these flowy infinity scarves. I found the fabric at our local craft store's annual tent sale for about $3 a yard.


Love and Floral,
Leah Joy