Friday, October 9, 2015

The Most Amazing Leah-Purse Ever

Many many months ago, I had plans to sew a purse for myself.  Actually, I planned on sewing this purse:


It was part of my 101 Things in 2014 list - one of the many items that did not get completed.

And then when I found the most beautiful fabric ever, I thought, "Why waste this on just any purse? I should make exactly the purse I want!" Which is part of the reason that this bag did not get sewn right away - I had to plan!  The other part of the reason is that I am lazy.

However, all my planning finally got finished, I had acquired all the necessary pieces, and I made the best bag ever!  I thought a lot about what pockets I'd want where, and I have to say, after a month or two with this purse, I love it even more!


Is that not the most perfect fabric for me ever?  I really customized this bag for myself, too, and took the time to do the harder things that would make it that much nicer.  I made the strap extra long (I'm tall and I have a long torso, so most purse straps are barely long enough at their longest setting) and I also made it adjustable.


The style of strap adjuster you see here is, for some reason, not available in craft stores.  They have strap adjusters, but not metal ones with a sliding middle bar.  The sliding middle bar makes it so much better!  I found a set on Etsy for several dollars, but eventually ended up buying a purse on sale at Salvation Army and just cutting the strap adjuster hardware off of it.  It came with the strap adjuster and two square ring thingies:


I gave the bag a front flap, which I also made into a zipper pocket.  Right now, I only use this for a pen.


The reverse side of the flap has a long horizontal piece of Velcro sewn on that attaches to these two vertical strips:


I sewed a basic open pocket to both the front and back.  I keep my planner in the front pocket and the back is the perfect size for a book.  I actually chose my measurements for this purse so that it could hold a book.


This is the book pocket in the back:


I wanted a zipper and a flap, and because it's my purse, I can have both.  I usually leave the main zipper open, but it's nice to be able to close it if I want more security.  While most of my sewing is pretty tidy, the top-stitching around the zipper panel is the one place where it gets messy.  But I don't care, because it's my purse and you can only notice if you're looking for it.


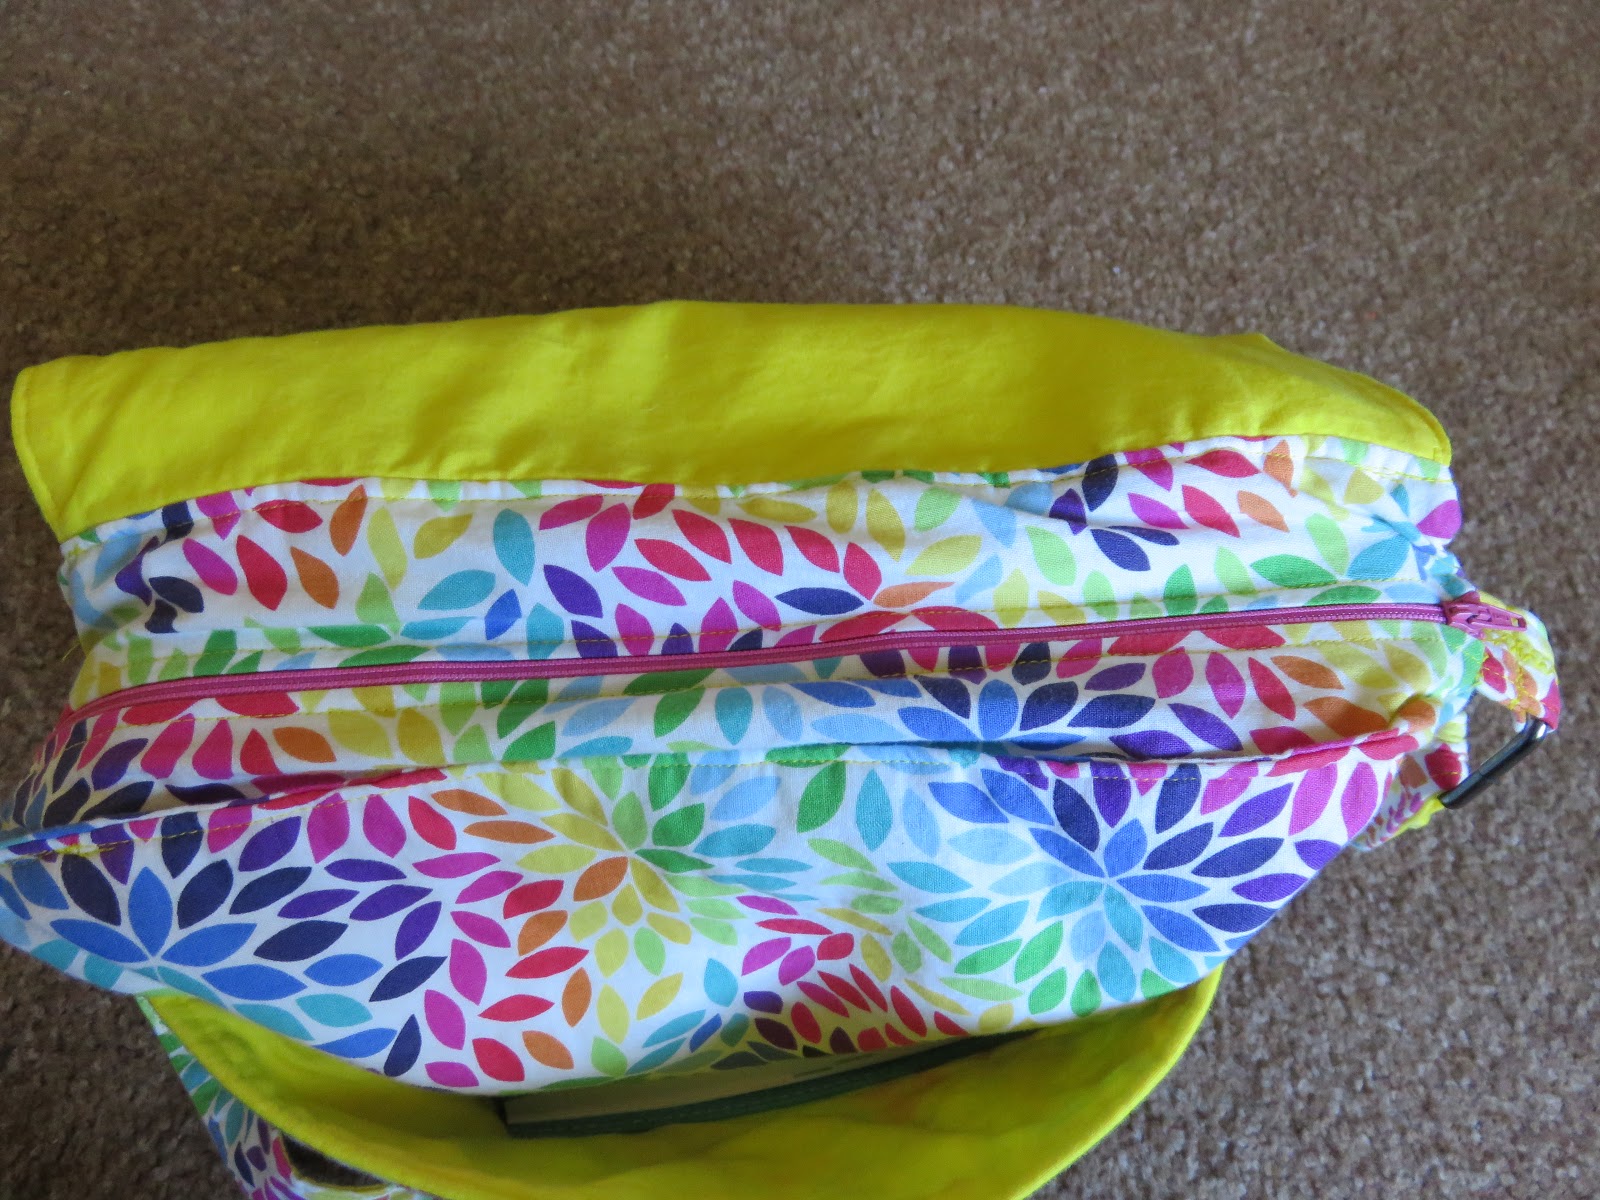
The inside is, of course, fully lined (I love how cheerful the yellow is!) and quite spacious.


I added a small zipper pocket to the back.


And a small open pocket to the front:


I'm so glad I took the time to think through where I'd want everything, because this really is the most perfect purse for me.  There's a place for everything, so it's easy to keep clean (if, you know, I wanted to do that) and it's easy to find things.  I keep my keys and phone in the small pocket inside (with the green zipper), so if my phone is ringing, I know right where to reach.  And I can always find my keys.


Plus, it's gorgeous.

Love and Top-Stitching,
Leah Joy

Wednesday, October 7, 2015

New Favorite Cupcakes

Apple Cider Cupcakes with Nutmeg Frosting.  Yep.  I found this recipe (guess where! guess where!) several months ago and knew I had to make them this fall.  So I did. (Wow, cool story, bro.)

Regardless of my story-telling abilities, these cupcakes are amazing.


Cake and frosting should taste like what it is.  That sounds obvious, but I can't tell you how many times I've tried a recipe for a raspberry cake (for example) that didn't taste anything at all like raspberries.  For my bakery, I only have flavors on my menu that I know pack a punch.  There is no doubt about the flavor when you bite into a lemon cupcake (or when you even just smell it).  Sometimes, I don't even want to try new cake recipes because I'm afraid they won't have strong enough flavors.  I'm so glad I tried this recipe, because man, do they pack a delicious, fall-flavored punch!


The cupcakes themselves smelled like doughnuts when I took them out of the oven, which was a good sign.  I tried one without the frosting and loved it so much; the apple cider flavor was so strong.  The buttercream, however, helped bring out the spices in the cake even more.  The cake and frosting flavors complemented each other perfectly.  I know I sound like a snobby gourmet right now, but these cupcakes really are that amazing.


I did stray from her recipe in two ways.  First of all, she gave instructions to add vanilla to the batter, but not an amount, so I added 1 tsp (well, actually 2, but that's because I doubled the recipe).  This guess seems to have worked out just fine. Secondly, I edited the buttercream by adding milk, more powdered sugar, and more nutmeg.  I needed it to stretch to 24 cupcakes, but I didn't want to add more butter.  (2 sticks of butter in frosting really should cover 24 cupcakes easily.)  Again, this worked very well and the frosting was delicious.

These are definitely a seasonal item, but a recipe to which I will return every fall!

Love and Cloves,
Leah Joy

Monday, October 5, 2015

Just For Fun: A Few Projects

A million months ago, I bought a few plain t-shirts and some fabric markers and had every intention of decorating the shirts as gifts for some friends.  A few months ago, I finally did that, and here are the results:


(Just in case you don't know, the references are from Gilmore Girls and Pride and Prejudice.)

I also tried a few cookie recipes from Pinterest.  Here are some iced oatmeal cookies:


These are very classic, fairly simple to make, and delicious.

I also made these cinnamon roll cookies.  They were a little more time-consuming, as the dough had to be made and flattened, then chilled, then 'decorated' and rolled, then frozen, and then cut and baked.  However, they were much more popular than the iced oatmeal cookies.  They're also fairly pretty to look at, where the dough didn't break apart when being rolled up.


I really liked both of these cookies, although I couldn't eat very many of either, as sugar does not agree with pregnant me. :(  (Oh well, it's probably healthier this way.)

Love and Cinnamon,
Leah Joy

Friday, October 2, 2015

The Fireplace

If we're friends on Facebook, you've already seen these photos (months ago), but they do have a place on this blog, so I'm still sharing them here.

I actually have before pictures!  This picture was taken before we even owned the house:


The color almost looks red in the photo above, but it was really more of a purple-mahogany.

Here's a picture I took after we moved in.


We hated that someone had painted this, and thought that if we could strip the paint off, the stone underneath might prove to be very beautiful.

We tried a few different methods of paint removal, but none of them worked very well on stone.  Caleb is very allergic to anything that smells chemically, so we first tried a heat gun with a wire brush.  This technically worked, but each stone took over an hour and still had some paint down in the cracks.  Plus this was back-breaking, stinky work.  We tried a low-odor chemical stripper, which was not very low odor, and also only served to smear the paint around.  So we gave up, and left the fireplace looking much like this:


The above picture was taken after Chloe spent a few hours scrubbing it with TSP.  Even that made such a huge difference!

We finally decided to paint over the whole thing, but try to make it look like stone.

I found a tutorial on Pinterest and bought the supplies for it, but Chloe did 95% of the work all by herself.  (If you are interested in doing this project, I highly recommend the tutorial linked here.  Make sure you read the comments, too.  This tutorial was perfect for us, because her fireplace stones are the same shape and size as ours, and hers was just as ugly to start!)

The next step, after laying down paper and taping off the wall, trim, and mantel, was to prime it.  This took several hours, as getting a thick, gloppy primer into the tiny crevices of stone is no quick job.


Here it is all primed:


Next, Chloe added two coats of a flat base color.  She painted over all the stones, and in all the mortar spaces.  The stones would have extra paint added to them, but this color would be it for the mortar.


This was already such a huge improvement, and we knew that if the attempts to make the stone look natural didn't work, we could always add another coat of the flat paint and leave it plain.

Next, using the techniques described in the tutorial, Chloe dabbed, sponged, wiped, smeared, etc.  At first, no one thought it was going to work.  It looked weird and kind of bad.  But she kept adding to it, and then all of a sudden, it became amazing.  


It looks like real stone!


I'm so grateful to Chloe for all her work on this project!  The fireplace just glows with beauty now. We were hoping to take it from ugly to not-noticeable, but she took it from ugly to beautiful!  (And in only like 15 hours!)

Love and Sponges,
Leah Joy